Lenovo OneKey not working / broken?
Lenovo OneKey missing / not installed?
New hard drive?
Here's how to get it running...
-
Lenovo OneKey missing / not installed?
-
New hard drive?
Here's how to get it running...
Recently someone generously gave me an old Lenovo Z50-75 laptop, running Windows 10.
As the laptop had a previous [careful] owner, I wished to restore it to its factory settings prior to using the machine myself, as is customary under such circumstances.
Instead of providing owners with Operating System disks, the vast majority of modern PCs are shipped with recovery partitions - hidden partitions on the hard drive which contain the factory-installed images of the operating system [often with extra software and bloatware].
The principle being: if you ever encounter a problem with the machine, as long as the integrity of this partition remains intact, you can always roll your machine back to its original "factory" state using either the manufacturer's designated recovery process, or Windows own recovery process.
Most modern Lenovo machines use a proprietary bit of software called the OneKey Recovery Environment - to access this, when the machine is switched off, you press the small "NOVO" button next to the power port, boot up into the recovery software and recover the OS.

The button can be found elsewhere on other Lenovo models.
Additionally, you can access the same menu from within Windows [if the software has been installed] - type "onekey" in the search bar, open up the app and select "System Recovery" - the machine will reboot into the OneKey menu - you select "System Recovery" and follow the instructions.

All good so far?
Well, not on this machine.
Whatever I tried, I could not access the OneKey Recovery feature, and thus was unable to use the manufacturer's recovery app.
Sure, I could access the OneKey boot menu via the NOVO button, but selecting "System Recovery" would invariably result in the machine just booting back to the windows OS - not the recovery feature!
I made numerous attempts to rectify the situation: fixing the master boot record [BOOTREC /FIXBOOT and BOOTREC /FIXMBR], rebuilding the boot record command [BCDEdit], restarting the recovery environment [reagentc /enable], all to no avail.
Defeated by this, I resorted instead to using the in-built Windows Recovery feature, going through various options from repairing the start-up to eventually resetting the PC.
However, the Windows reset also refused to work - it went merrily on its way for a while, but always hung during the reset process - often at "Resetting this PC 3%" or similar:

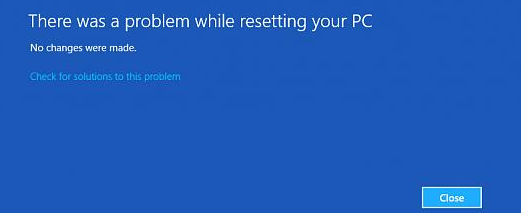
Following this, I'd get a charming message saying:
- "There was a problem while resetting your PC.
No changes were made."
I also tried booting off various external USB recovery drives - all with the same useless results - no recovery, no reset.
Only a complete Windows reinstall would give me a clean, fresh system, and then I still wouldn't have access the Lenovo Onekey Recovery system - this also would need to be reinstalled.
A quick wander through google revealed that the loss of Lenovo's OneKey Recovery system was a common occurrence.
There are a number of possible explanations as to why it can happen, the most common being that any modifications to the hard drive's partition table can make the system unrecogniseable to OneKey.
So,
-
if you resize a partition, Onekey can stop working.
if the partition fails, Onekey will stop working.
if you upgrade from windows 8 to 10, Onekey can stop working.
if you look at it too hard, Onekey can stop working.
if you mention Brexit, Onekey can stop working.
I contacted Lenovo support about this - they said that once OneKey was gone, there was little that I could do - all they did was send me a link to download Microsoft's "Create Windows 10 installation media", saying I could create a recovery USB drive from this and perform a clean install of windows, but if I wanted to restore the OneKey feature [with its factory installed image], I would have to ship the laptop to them and pay a nice and cosy three-figure sum for them to reinstall it!
I then asked Lenovo about the availability of the OneKey system for reinstallation after, say, upgrading a hard drive, and was told that the process was far too complicated for them to allow us mere users to attempt, which was why they only did the process in-house [and charged an arm and a leg to the user for the honour of doing so].
Too complicated?
Challenge accepted!
To Reinstall Lenovo OneKey recovery
For this you will require two USB drives - one at least 1GB [for OneKey], the other at least 16GB [for Windows OS installer].
To start, you need to acquire Lenovo's OneKey Engineering system - the one Lenovo won't actually give you because they only trust their own little elves to use it properly [see above].
Specifically, you need a ISO you can turn into a bootable USB.
I had to search around all over for this - there are plenty of threads discussing the reinstall of OneKey, but all the download links they provided for the software [either versions 7 or 8] were dead.
I eventually found a torrent for it - here's the link:
https://www.magnetdl.com/file/1359249/lenovo-okr8-one-key-recovery-8-engineer-iso/
Once you have downloaded this, create a bootable USB from this ISO using a tool such as PowerISO.
The next step is to identify your Windows Product key and the version of Windows you are using.
Sometimes the product key is embedded directly into the BIOS of your machine, so is not required when reinstalling windows, but this is not always the case so, before wiping your system, you should retrieve this - there is plenty of software online to help you do this, for example NirSoft’s ProduKey.
To identify the version of windows you are running, go to "Settings", then select "About", scroll down and under "Windows Specifications" it gives you the version and build number.

Now that you have the windows version/build, go to google and type in "create usb windows xxxx" where xxxx equals your build version.
Find the correct windows .img or .iso, download this and burn to USB [via again PowerISO or rufus].
Finally, before you start doing irrepairable damage to your system, back up all your personal files, photos, passwords, bookmarks, settings etc - these will be lost as you are now going to wipe your entire drive.
You can use "File History" for your personal stuff or, if you have the space, back up the system by selecting "Backup and Restore (Windows 7)" and then selecting "Create a System Image".
Now, on your freshly created USB bootable drive containing the Onekey Recovery Engineering .iso, navigate to the folder called "okr8" and open up the file called "create.ini".
You will see this:
select disk 0
clean
convert gpt
create partition primary size=1000
format quick fs=ntfs label="WINRE_DRV"
assign letter="T"
set id="de94bba4-06d1-4d40-a16a-bfd50179d6ac"
gpt attributes=0x8000000000000001
create partition efi size=260
format quick fs=fat32 label="System"
assign letter="S"
create partition primary size=1001
format quick fs=fat32 label="LRS_ESP"
gpt attributes=0x8000000000000001
assign letter="Q"
create partition msr size=128
create partition primary size=100000
format quick fs=ntfs label="Windows8_OS"
assign letter="W"
create partition primary
format quick fs=ntfs label="Lenovo"
assign letter="O"
shrink minimum=20000
create partition primary
format quick fs=ntfs label="PBR_DRV"
assign letter="R"
set id="de94bba4-06d1-4d40-a16a-bfd50179d6ac"
gpt attributes=0x8000000000000001
list volume
select disk 0
list partition
sel par 3
set id="BFBFAFE7-A34F-448A-9A5B-6213EB736C22"
gpt attributes=0x8000000000000001
assign letter="Q"
list volume
exit
-
create partition primary size=100000
format quick fs=ntfs label="Windows8_OS"
If your hard drive is, for example 1TB, then change the size value from "100000" to "930000" [~930GB]
If your hard drive is, for example 500GB, then change the size value from "100000" to "430000" [~430GB]
In other words, always leave a bit of spare space - ~70GB - for all the hidden system and restore partitions.
Change the label from "Windows8_OS" to "WindowsX"
You can also change the "Lenovo" label to "Storage" or "Backup" if you wish.
If you wish to further sub-divide up your hard drive, you can add to this .ini the following lines, before the first "create partition primary" :
-
create partition primary size=[whatever size is required]
format quick fs=ntfs label="another_drive"
assign letter="choose a previously unassigned drive letter eg U"
Make sure you have the space for this extra partition on your drive!
Save the "create.ini" file.
Now, insert the OneKey USB drive into your Lenovo machine, and press the "NOVO" button.
-
From the boot menu, select "BIOS Setup"
-
Go into the BIOS and change the boot settings from "UEFI only" to "legacy mode", and move the USB HDD to the top of the boot list.
Exit and save.
-
Reboot the machine and it will eventually boot off the USB drive into a Windows 8 environment, whereupon this scary screen full of Chinese will appear:

-
Now, check/tick the single box on the screen, then hit the button below it to start.
In the background, the script you modified in create.ini is running - it can take a while.
Proceed with this, then...
-
[1] Remove the USB drive as soon as the screen goes blank.
[2] Turn off the machine once it starts to reboot [on the Lenovo screen]
[3] Once again, press the "NOVO" button, and select "System Recovery" from the menu.

If it does, then you've successfully reinstalled the Lenovo OneKey Recovery system onto your hard drive - woot!
If it does not, then start again, you've done something wrong, possibly something to do with the space you assigned to the partitions in create.ini.
Either way, there's still a way to go before you have a fully working OneKey recovery partition...
The next step is to return to the BIOS [via either the NOVO button, or FN-F2 or FN-F12] and restore the boot settings to UEFI.
Leave the USB HDD at the top of the boot list, insert your bootable Windows10 .iso USB drive, and save and exit from the BIOS setup.
The machine should now boot up into Windows 10 setup:

Go ahead and install windows.
While you're there, install everything else you may want as your "bedrock" factory system - security, browsers, any essential applications.
Uninstall anything you don't want.
Make any customisations you want to the system.
Check and update all the drivers from the Lenovo website [start by selecting "detect my serial number"].
Copy over all the settings and files you backed-up from your previous windows installation.
You should now have a machine running perfectly, as it's a fresh install, with all your favourite things on it.
Empty the recycle bin.
Run "Disk clean up" and clear out the installed drive of anything unnecessary or superfluous to your needs.
Turn off the machine, press the "NOVO" button once again, and select "System Recovery" from the menu.
Once the screen appears, press CTRL-SHIFT-O to open a command shell.
Type in DISKPART, then once this has loaded, type in LIST VOLUME.
Your results should look something like this:

You are looking for the drive letter associated with the partition labelled "PBR_DRV", in this case the letter "K".
-
Type "EXIT" to leave DISKPART.
-
Type "K:" [or whatever letter you have corresponding to your PBR_DRV partition] and press return.
-
Type "CD onekey\osimage" and press return.
-
Type "osimage /nopbr" and press return.
-
Type "osimage /fb" and press return.
The entire image of your recently created Windows 10 installation is now being backed up to the recovery partition - depending on how large your installation is, and how many programmes etc you added, this can take a while.
A cup of tea?
You could even go to the shops...
Eventually the process finishes - exit the command shell/terminal, exit from OneKey Recovery and boot back into windows.
Hopefully, everything should still be OK - sometimes there is a check/repair on the C: drive on this first boot back into windows, but after that everything should be stable.
You now have a working Lenovo OneKey Recovery system - congratulations.
Don't believe me?
-
Shut down the machine.
-
Press the "NOVO" button.
-
Select "System Restore"
-
On the OneKey Recovery menu, select:
"Restore from initial backup" and click on "NEXT".
Confirm all the prompts.
The system will now be restored from your own, bespoke tailored, "factory" backup!
[This can also take a while...]
NB: To make your system a little bit more secure, I suggest you go back into BIOS setup and push the USB HDD down the boot order list, and the Windows Bootloader to the top.
osimage can obviously be used to update your "factory" image at a later date - just make sure you only overwrite it with the best, most secure version of windows you can muster!
External Sources
Here are some very useful links without which none of this would be possible:-
http://forum.notebookreview.com/threads/solved-fix-repair-nova-button-and-one-key-recovery-on-lenovo-yoga-2-pro-after-ssd-upgrade-full-walkthru.767275/
https://forum.lowyat.net/topic/3684883/all
http://forum.notebookreview.com/threads/how-to-restore-onekey-recovery-function-after-changing-partition-size-y580-and-maybe-others.688883/
Great guide,
ReplyDeletei ended up changing the code at the end to add another partition this way i could max the new partition without bothering too much.
create partition primary size=20000
format quick fs=ntfs label="Lenovo"
assign letter="O"
create partition primary size=20000
format quick fs=ntfs label="PBR_DRV"
assign letter="R"
set id="de94bba4-06d1-4d40-a16a-bfd50179d6ac"
create partition primary
format quick fs=ntfs label="another_drive"
assign letter="U"
when trying your way the two last partitions were missing as it changes the partition numbering
this way you choose a size for each of the original partitions [note "PBR_DRV" has to be at least 20000, "Lenovo" or "backup" can be less, up to about 5000 - not tested i went with 15000]
thanks for posting, i was lost without your link and info.
Happy to help!
Delete